
Ribbon hair bows are a popular and versatile accessory, adding elegance and charm to hairstyles․ They can be customized to suit various styles and occasions, making them a timeless fashion staple․ With simple techniques and materials, creating ribbon hair bows is an easy and rewarding DIY project for crafters of all skill levels․
What Are Ribbon Hair Bows?
Ribbon hair bows are decorative accessories made from fabric ribbons, designed to enhance hairstyles․ They are typically small, looped, and secured in the center, creating a bow-like appearance․ These bows can be styled in various ways, from simple and delicate to elaborate designs; They are popular for their versatility, suiting different hair types, occasions, and personal styles․ Ribbon hair bows are a creative way to add flair to outfits, making them a favorite among crafters and fashion enthusiasts alike․
Popular Uses of Ribbon Hair Bows
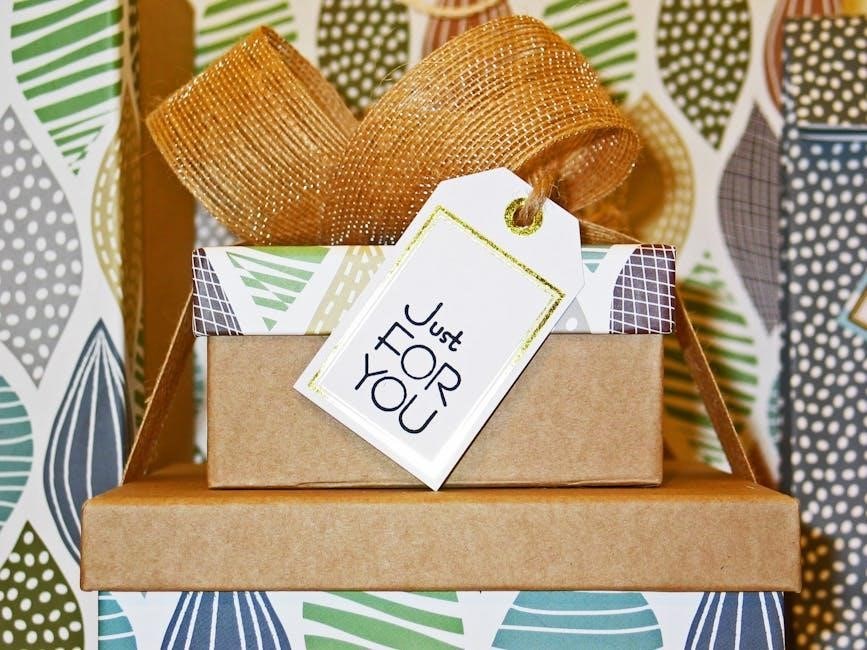
Ribbon hair bows are a versatile accessory, enhancing hairstyles for special occasions and everyday wear․ They also adorn hats, bags, and clothing, adding a decorative flair to outfits․ Additionally, they are used in gift wrapping, creating a polished and elegant presentation․ In some cultures, they are part of traditional attire, symbolizing style and heritage․ Their appeal spans across ages, making them a favorite among both children and adults․
Materials Needed for Making Ribbon Hair Bows
- Ribbon (satin, grosgrain, or velvet)
- Scissors
- Glue gun
- Needle and thread
- Hair clip or bobby pin
Essential materials include high-quality ribbon, scissors, a glue gun, needle, thread, and a hair clip․ These tools help create professional-looking bows with ease and precision․
Ribbon Selection
Choosing the right ribbon is crucial for creating stunning hair bows․ Satin ribbons offer a smooth, shiny finish, while grosgrain ribbons provide a textured, casual look․ Velvet ribbons add a luxurious feel, perfect for special occasions․ Consider the desired style, durability, and color scheme when selecting ribbon․ For a professional finish, opt for high-quality ribbons with vibrant colors and consistent patterns․ The ribbon’s width and thickness will also impact the bow’s size and appearance, making it essential to choose appropriately for your design․
- Satin ribbon for a smooth, elegant look
- Grosgrain ribbon for a textured, casual style
- Velvet ribbon for a luxurious finish
Tools Required
To craft ribbon hair bows, essential tools include sharp scissors for precise cuts, a hot glue gun for securing layers, and a needle and thread for stitching․ Bobby pins are necessary for attaching the bow to hair․ Optional tools like a lighter for sealing synthetic ribbon edges and a measuring tape for accurate sizing can enhance your craftsmanship․ Having these tools ready ensures a smooth and efficient bow-making process․
- Scissors for cutting ribbon
- Hot glue gun for bonding materials
- Needle and thread for stitching
- Bobby pins for securing the bow
- Lighter (optional, for sealing ribbon edges)
- Measuring tape (optional, for precise sizing)
Additional Accessories
Enhance your ribbon hair bow with embellishments like beads, sequins, or pearls for added flair․ Consider using fabric paint or glitter for a personalized touch․ Bobby pins or hair clips are essential for securing the bow․ Optional accessories include decorative centers, like rhinestones or bows, to add dimension․ Hot glue guns and needles can help attach these extras securely․ These accessories allow you to customize and elevate your ribbon hair bow, making it truly unique and stylish․
- Beads or sequins for decoration
- Fabric paint or glitter
- Bobby pins or hair clips
- Decorative centers (e․g․, rhinestones)
- Hot glue gun
- Needle and thread
Basic Techniques for Creating Ribbon Hair Bows
Mastering basic techniques like creating loops and securing the center is essential for crafting ribbon hair bows․ These foundational steps ensure a neat, professional finish․
Creating Loops
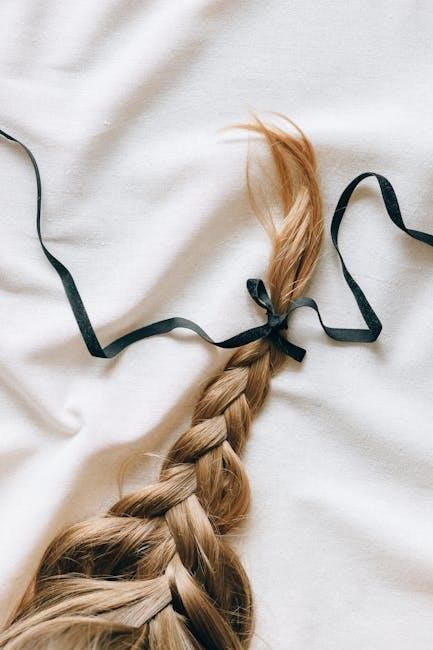
Creating loops is a fundamental step in making ribbon hair bows․ To form a loop, fold the ribbon in half and pinch the center point․ This creates the base for your bow․ For a standard bow, make two loops on either side of the center, ensuring they are even in size and shape․ Adjust the loop sizes based on the desired bow dimensions․ Evenly spaced loops are key to achieving a balanced, polished look․ This step sets the foundation for a professional finish․
Securing the Center
Securing the center of your ribbon hair bow is crucial for a polished look․ Once loops are created, bring the ribbon ends together at the center․ Use a small pin or a dot of hot glue to hold them in place․ For added stability, wrap the center with a thin ribbon or thread․ This step ensures the bow retains its shape and prevents it from unraveling․ A well-secured center is essential for a professional and long-lasting ribbon hair bow․
Step-by-Step Guide to Making a Simple Ribbon Hair Bow
Gather materials, form loops, secure the center, and assemble the bow․ Finish with trimming and shaping for a polished look․
Gathering Materials
To start, you’ll need high-quality ribbon, scissors, a hot glue gun, and a hair clip or pin․ Measure and cut the ribbon to your desired length for the bow․ Choose a ribbon color and texture that matches your style․ Gather any additional embellishments, like rhinestones or lace, for customization․ Ensure all tools are within reach to streamline the process․ Proper preparation ensures a smooth and enjoyable crafting experience for your ribbon hair bow creation․
Forming the Loops
Fold the ribbon in half and locate the center point․ Pinch this point firmly to create the base of the bow․ Begin forming loops on either side of the center by folding the ribbon into desired shapes․ Ensure each loop is evenly sized for a balanced look․ Secure the loops temporarily with a clip or pin․ This step sets the foundation for the bow’s structure, allowing you to achieve the perfect shape before final assembly․
Assembling the Bow
Bring the loops together at the center, ensuring they align evenly․ Secure the loops by wrapping the ribbon tightly around the center or using a small dot of hot glue․ Tuck the ends under the loops to hide them․ For a polished finish, attach a hair clip or bobby pin to the back using hot glue․ Make sure the bow is snug and the loops are evenly spaced․ This step transforms individual loops into a cohesive, professional-looking bow that’s ready to wear or attach to your desired item․
Finishing Touches
Trim any excess ribbon or thread for a clean look․ Use hot glue to secure the center tightly, ensuring the bow holds its shape․ Lightly fluff the loops to create volume and symmetry․ For a professional finish, tuck the ribbon ends under the loops or trim them neatly․ Optional: Apply a fabric sealant to prevent fraying or add a light spritz of hairspray for long-lasting hold․ Your bow is now complete and ready to be worn or attached to your desired accessory․
Customizing Your Ribbon Hair Bow
Personalize your bow by choosing ribbons that match your outfit or hairstyle․ Add embellishments like rhinestones, pearls, or bows for a unique, polished look that reflects your style․
Using Different Ribbon Colors
Choosing the right ribbon color can elevate your hair bow’s style․ Opt for pastel shades for a soft, delicate look or bold jewel tones for a statement piece․ Mix and match colors to create unique combinations that complement your outfit or occasion․ For a subtle touch, use monochromatic shades, or go vibrant with contrasting hues․ Seasonal colors, like red for Christmas or pink for spring, add festive flair․ Experiment with ombre effects or gradient ribbons for a modern twist, ensuring your bow stands out with personalized flair․
Adding Embellishments
Embellishments like rhinestones, beads, or small bows can add personality to your ribbon hair bow․ Use hot glue to securely attach decorations, ensuring they complement the ribbon’s color and texture․ For a delicate look, add a single charm at the center, or scatter beads for a more elaborate design․ Consider the occasion—rhinestones for formal events or playful bows for casual styles․ Experiment with layering embellishments for a unique, eye-catching finish that enhances the bow’s overall aesthetic and makes it truly special․
Advanced Techniques for Ribbon Hair Bows
Master intricate designs by creating multiple loops and layering ribbons․ Experiment with textured fabrics or patterned ribbons for a sophisticated look․ Advanced techniques elevate your bow-making skills, allowing for unique and professional finishes that stand out in both casual and formal settings․
Creating Multiple Loops
Creating multiple loops enhances the fullness and texture of your ribbon hair bow․ Start by folding the ribbon into the desired number of loops, ensuring each is evenly sized․ Pinch the center tightly to maintain shape․ For a voluminous look, increase the number of loops, stacking them neatly․ Secure each loop with a pin or stitch before wrapping the center with a smaller ribbon piece․ This technique adds dimension and visual appeal to your bow, making it more intricate and eye-catching․
Layering Ribbons
Layering ribbons adds depth and texture to your hair bow․ Start by cutting multiple ribbon pieces of varying widths or patterns․ Stack them evenly, aligning the edges․ Fold the stacked ribbons in half to form a loop, then secure the center with a pin or stitch․ For a polished look, wrap a narrow ribbon around the base to hide any imperfections․ This technique creates a dimensional, multi-layered effect, perfect for intricate designs․ Experiment with contrasting colors or textures for a unique, eye-catching finish․
Troubleshooting Common Mistakes
Troubleshooting is key to refining your ribbon hair bow skills․ Common mistakes often arise from improper loop alignment or uneven tension, leading to a less polished finish․ Being attentive to these details ensures professional-looking results every time․
Uneven Loops
Uneven loops are a common issue when crafting ribbon hair bows․ To address this, ensure symmetry by measuring and marking the ribbon before folding․ Use a template or guide to maintain consistent loop sizes․ If loops become misaligned, gently adjust them while the ribbon is still pliable․ For precise results, consider using a bow maker or clips to hold loops in place during assembly․ Even tension and careful pinching at the center will help achieve uniform, professional-looking loops that elevate your bow’s appearance․
Loose Centers
A loose center can cause the bow to unravel or appear sloppy․ To fix this, ensure the ribbon is tightly pinched at the center before securing․ If the center is already loose, gently re-tighten the loops and re-pinching firmly․ Applying a small dot of hot glue to the center can reinforce the hold․ For added security, wrap a thin thread or wire around the center before assembling the bow․ This ensures a sturdy base and prevents the loops from coming undone over time․
Attaching the Ribbon Hair Bow
Attaching the ribbon hair bow securely ensures it stays in place․ Use bobby pins for a firm grip or hot glue for a permanent attachment․ Clips are also durable options for long-lasting wear․
Using Bobby Pins
Using bobby pins is a reliable method to attach your ribbon hair bow․ Slide the pin through the center of the bow and secure it firmly into your hair․ For added stability, use two pins crossed at the base of the bow․ Ensure the pins are snug but not tight to avoid discomfort․ This method works well for most hair types and keeps the bow in place all day․ For finer hair, consider using smaller pins, while thicker hair may require larger ones for better grip․
Applying Hot Glue
Applying hot glue is a durable method for attaching ribbon hair bows, especially for long-term wear․ Apply a small amount of glue to the back of the bow and press it firmly onto a hair clip, headband, or directly into your hair․ Hold for a few seconds until the glue sets․ For a secure hold, ensure the glue covers the entire attachment area․ Be cautious to avoid skin contact, as hot glue can cause burns․ This method is ideal for sturdy hair accessories and ensures the bow stays in place all day․

Styling Tips for Wearing Ribbon Hair Bows
Ribbon hair bows complement various hairstyles, from sleek ponytails to loose waves․ Choose colors that match your outfit for a polished look, suitable for casual or formal events․
Hair Styles for Ribbon Hair Bows
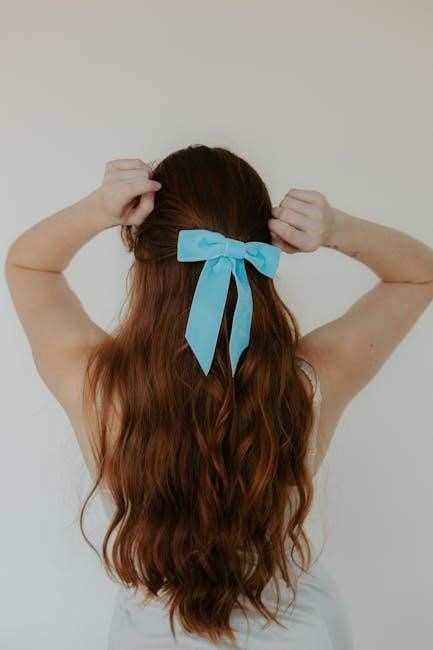
Ribbon hair bows pair perfectly with sleek ponytails, braids, or loose waves․ They add a touch of elegance to updos or can be worn with casual, undone hairstyles․ For a polished look, place the bow at the base of a high ponytail or braid․ For a softer appearance, attach it to the side of a low bun or puff․ The versatility of ribbon hair bows makes them suitable for all hair lengths and styles, from short bobs to long, flowing locks․
They also complement vintage-inspired looks, such as pin-up curls or headbands․ Whether you prefer a subtle, minimalist design or a bold statement piece, ribbon hair bows can elevate your hairstyle for any occasion․ Experiment with placement and sizing to find the perfect match for your look․ The right bow can instantly transform a simple hairstyle into something extraordinary and eye-catching․
Occasions to Wear Ribbon Hair Bows
Ribbon hair bows are versatile and can be worn for various occasions․ They add a charming touch to formal events like weddings, parties, and galas․ For casual gatherings, such as picnics or brunches, a subtle bow can elevate a simple hairstyle․ They are also perfect for festive holidays, like Christmas or Easter, where themed ribbons can match the celebration․ Additionally, ribbon hair bows are ideal for everyday wear, offering a polished yet effortless look․ They suit all ages and styles, making them a great accessory for any event․
Creating ribbon hair bows is a simple yet rewarding craft that allows for endless creativity and personal style․ Whether for special occasions or everyday wear, these bows add a touch of elegance and charm․ With basic materials and techniques, anyone can master the art of making ribbon hair bows․ Experiment with colors, embellishments, and designs to create unique accessories that reflect your personality․ Embrace the versatility of ribbon hair bows and enjoy the joy of handmade craftsmanship․